Considered one of the strongest fishing knots, the Palomar knot is truly one of the best and most importantly, one of the easiest knots to tie.
Different Uses of a Palomar Knot
It has some far-ranging applications for not only fishing but also everyday life. Going fishing in the winter? It's a great knot to use when your fingers are cold because it doesn't require that much dexterity. It's also pretty forgiving if your fingers slip while you're trying to tie it. One of the coolest uses for this knot is the ability to tie multiple items in line. It can be as simple as leaving a longer tag end and attaching your hardware there. If you need to convert it back, you can just cut the tag end off at any point.
How Do You Make the Palomar Knot?
Step 1:
Hold the fishing hook, and with your right hand, thread the string through the eye of your hook.
Step 2:
Hold the string with your left hand and push it back through to create a loop.
Step 3:
Pull the fish hook downward to give it a bit of length. Fold the loop across the main line.
Step 4:
Pass the loop through the circle you created. This makes a simple overhand knot.
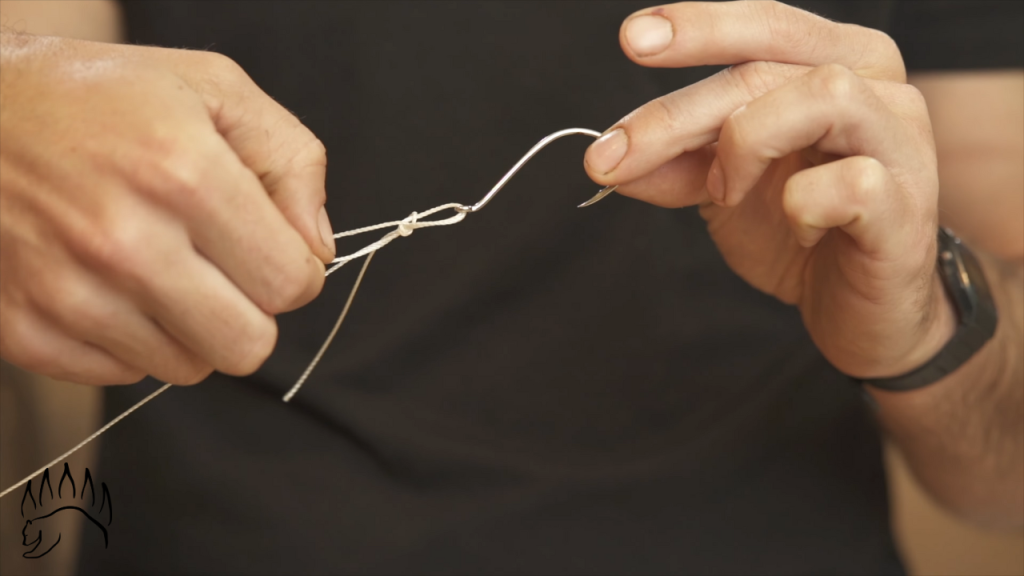
Step 5:
Pass the hook through the center of the loop.
Step 6:
Just before you tighten up, dip into water to minimize possible friction.
Step 7 :
Flip that loop up over the knot and now pull the string in the opposite direction. With the tag end, you can cut it off or tie another hook to it. But pull tight, and you have your Palomar knot.
Common Palomar Knot Mistakes and Fixes
When using different types of lines, you'll find that some may cinch up a bit better than others. So, here are a few tips to help you through that. To fix this, make sure to slowly dress the knot by flipping the loop upwards, and as you're tightening it, just go carefully and make sure the loop stays there. Using braided lines? Some people opt to tie a double overhand knot, which is just an extra wrap, and that just adds extra strength.
Adding a Mid-Line Attachment or Dropper Hook
This knot is to add a midline item when you already have an established line. For this, you don't have to have access to the tag end.
Want to add a carabiner midline?
Simply take a bight from the line which is just folding it down. Pass that little loop through the eye of your weight or carabiner or whatever you're using. Pull your line through and repeat the same process as before. Do the overhand knot, get that loop, and pass the weight through it. Finally, pull to tighten. The same could be applied when camping or stringing an item to a line. You simply create a loop, fold it over, pass your item through, and tighten the line. Be a master at tying knots with The Bear Essentials Outdoor Co.'s knot tying bundle. This kit includes a pocket field guide on tying the frequently used knots and two practice ropes. Order yours here. Subscribe to my Youtube Channel at The Bear Essentials.


 To fix this, make sure to slowly dress the knot by flipping the loop upwards, and as you're tightening it, just go carefully and make sure the loop stays there. Using braided lines? Some people opt to tie a double overhand knot, which is just an extra wrap, and that just adds extra strength.

 The same could be applied when camping or stringing an item to a line. You simply create a loop, fold it over, pass your item through, and tighten the line. Be a master at tying knots with The Bear Essentials Outdoor Co.'s knot tying bundle. This kit includes a pocket field guide on tying the frequently used knots and two practice ropes. Order yours here. Subscribe to my Youtube Channel at The Bear Essentials.


![Tarp Ridgeline Kit [Cordage Bundle] - The Bear Essentials Outdoors Co., , ,](http://thebearessentials.com/cdn/shop/files/tarp-ridgeline-kit-cordage-bundle-8380710.jpg?v=1767634331&width=533)
