

The Trucker's Hitch is truly one of the best knots you can learn. It's easy to tie and has a ton of practical uses. Along with an easy quick release, it boasts a mechanical advantage, which essentially multiplies your strength. That's why this knot is so popular in the outdoor community. Different uses for a Trucker's Hitch are for rigging canoes and gear to trucks and getting the perfect tension on tarps
Advantage of Using the Trucker's Hitch
This knot gives a mechanical advantage of about 2:1, after accounting for friction loss. What that means is, if you pull 10 pounds towards you, it's going to translate to about 20 pounds of force on the object. 
A Step-by-Step Guide to Tying a Trucker's Hitch
In this tutorial, we're adding a game-changer: an auto-locking mechanism. Let's say we're trying to secure a canoe onto a hitch. Just follow the step below to create the trucker's hitch.
Step 1:
Wrap the rope around the canoe with the free end on top. Take the free end of your rope, and thread it through an anchor point. Then pull the free end forward and let it go. 
Step 2:
Grab the standing line and create a small loop with a motion similar to turning a car's ignition to the ON position. 
Step 3:
With your left hand, hold the loop in place. Grab a bight of the rope with your right hand and feed it up and through the loop. 
Step 4:
Pull the bight with your right hand and pull the other line with your left hand. This motion locks the knot in place. This creates a slip knot. 
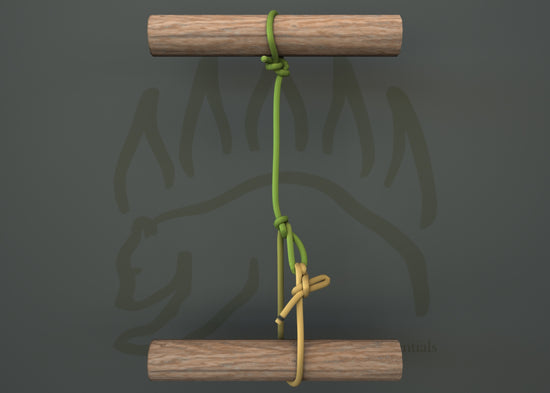
Step 5:
Take your free end and feed it through that slip knot. When you crank on it, it's going to provide a ton of pressure on whatever it is you're securing. 
Tying a Quick-Release Knot
Step 6:
Pinch the tip of the loop and grab a bight from the free end of the rope. 
Step 7:
With the right hand, wrap the bight around the standing line. 
Step 8:
Thread it back through the loop you created. With this additional knot, your Trucker's Hitch is pretty much secure.  Adding an extra safety knot is an option, but for a quick release, a simple tug on the free end unwinds the whole setup, letting all tension go with just one pull, including the slip knot when you yank on the standing line.
The Auto-Locking Variation
For that auto-locking variation, we perform the same steps as before.  Simply pass the free end twice through the slip knot. What this achieves is friction on your line. So, when you pull it tight and let go, that whole thing is going to lock in place. Whereas with the original, if you let go, that line would completely loosen. And though it is pretty secure, it's just a means of maintaining that tension before really locking it in place with that same halter-style hitch. It still maintains the same quick-release properties with the added step of just pulling that line forward, which releases the friction. That's all! I hope you enjoyed this tutorial.
If you're eager to become proficient at tying knots, be sure to visit The Bear Essentials blog and visit our knot-tying guides. Planning a camping trip in the near future? Don't forget to pack The Bear Essentials Apparel and Gear or check out our shop today!


![Tarp Ridgeline Kit [Cordage Bundle] - The Bear Essentials Outdoors Co., , ,](http://thebearessentials.com/cdn/shop/files/tarp-ridgeline-kit-cordage-bundle-8380710.jpg?v=1767634331&width=533)
