

How To Tie the Prusik Knot
Usage
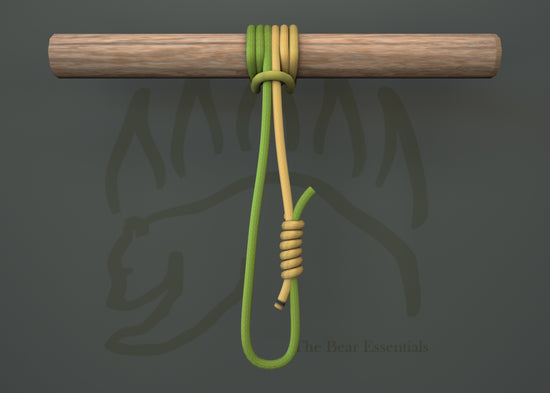
The Prusik Knot is renowned for its versatility and reliability. It is a midline loop that freely slides along the rope it's tied to. However applying tension to the loop results in the hitch biting down, causing it to hold in place. Whether you are climbing, camping, or find yourself in a rescue scenario, this friction hitch is an essential one to have in your skillset. The Prusik knot excels at tasks like ascending ropes, adjusting tarp tie-outs, or setting up camp lighting. Its simple design and omnidirectional functionality means it’s always ready when you need it.
Why Learn the Prusik Knot?
Its ability to firmly grip under tension yet release when the tension is removed makes it one of the most dependable friction hitches. From rescue operations to everyday tasks around camp, knowing how to tie and use the Prusik adds a valuable skill to your tool belt.
Common Uses
- Climbing: Ascend ropes safely and efficiently.
- Camping: Create adjustable tarp tie-outs.
- Search & Rescue: Anchor points and pulley systems for hauling.
- General Outdoor Tasks: Hang camp lighting or cooking pots above a fire.
- Bushcraft: Adjustable loops for chairs, shelters, or gear hoisting.
ABOK Number
(Ashley Book of Knots)
Other Names
CategoryFriction Hitch, Hitch
|
Characteristics:
- Friction Grip: Locks under tension, slides freely when released.
- Omnidirectional: Functions the same regardless of the pull direction.
- Adjustable: Ideal for creating adjustable loops and anchor points.
- Lightweight and Portable: Prusik loops are compact and easy to carry in your kit.
Similar Knots
Klemheist Knot vs. Prusik Knot
Learn to tie the klemheist knot
- Pros: Easier to tie with webbing and performs well for one-directional pulls.
- Cons: Lacks the omnidirectional functionality of the Prusik Knot.
Autoblock Knot vs. Prusik Knot
- Pros: Functions as a backup knot for rappelling; compact and easy to tie.
- Cons: Less grip strength than the Prusik under heavy loads.
Valdotain Tresse vs. Prusik Knot
- Pros: Strong grip with braid-like turns for added stability.
- Cons: More complex to tie and adjust than the Prusik Knot.
Farrimond Friction Hitch vs. Prusik Knot
- Pros: The FFH has a quick-release pull tab built into the knot.
- Cons: Generally used more for tensioning lines, instead of a midline knot.
Alpine Butterfly vs. Prusik Knot
- Pros: Creates a secure, load-bearing loop in the middle of a rope.
- Cons: Unlike the Prusik, it’s not a friction hitch and cannot slide along the rope.
History
The Prusik Knot is a friction hitch used to attach a loop of cord around a rope, commonly applied in climbing, canyoneering, mountaineering, caving, rope rescue, ziplining, and by arborists. The term "Prusik" refers to both the loops of cord used to tie the hitch and the hitch itself. The knot is named after Austrian mountaineer Karl Prusik, who is credited with its development. It was first shown in a 1931 Austrian mountaineering manual for rope ascending. Wikipedia
Security Level
The Prusik Knot is highly secure when tied with a properly sized loop, and worth noting that the actual Prusik loop should be made from cord thinner than the rope it wraps around.
Downsides
Can sometimes be difficult to untie after bearing significant weight.
Ineffective on frozen or wet ropes due to reduced friction.
Requires precise sizing between loop and main rope for best performance.
FAQ
Q1: What size of rope work best for the Prusik Knot?
There's no standard size that works best, the important thing is your prussik rope should be thinner diameter than the rope it wraps around.
Q2: Is it load-bearing / can it handle heavy loads?
Yes, it's often used as a safety in both climbing and repelling, as well as search and rescue.
Q3: Is the Prusik Knot suitable for cold or wet conditions?
It can be, but it's not ideal. The knot relies on friction, which is reduced on icy or wet surfaces.
Q4: Which is better, the Prussik or the Klemheist Knot?
The Klemheist is easier to tie with webbing but only works in one direction, unlike the Prusik which works in both.
Q5: When would I use the Prusik Knot?
It’s not just used for climbing or ascending ropes, but creating adjustable loops in outdoor scenarios like hanging tarps or stringing items midline at a campsite.
Important Notes on Safety
Always ensure your Prusik loop is the correct diameter and inspect the knot for proper dressing before use.


![Tarp Ridgeline Kit [Cordage Bundle] - The Bear Essentials Outdoors Co., , ,](http://thebearessentials.com/cdn/shop/files/tarp-ridgeline-kit-cordage-bundle-8380710.jpg?v=1767634331&width=533)
