

The Bellringer Knot is probably one of the coolest knots you probably never heard of. The knot holds in place if there's tension on the line. But if you give it a tug, the whole thing easily comes loose.
What is a Bellringer Knot Good For?
The bellringer knot is useful for lowering tools and gear when your rope is too short to double back on itself.


This is extremely helpful when camping in the backcountry. Simply tie the knot around your backpack handle, lower the pack down, and tug the rope back up to loosen its hold around the handle. Now you can use it to lower something else. After that, you can safely climb down the ridge. If you want to study how the knot collapses when you tug it, the Knot IQ app animates the Bellringer in 3D so you can watch the release happen slowly.
Common Uses for the Bellringer's Knot
- Camping and backcountry: lowering a pack off a ledge, then tugging the tail to retrieve the rope for a second lower or to climb down unencumbered.
- Household and workshop: temporarily shortening a hanging line — an old awning rope or a shutter cord is the classic low-stakes example.
- Bell towers: keeping a long bell rope off the belfry floor between rings, the job the knot is named for.
- Lofts and sheds: parking new rope ends off the floor in sail lofts and ship chandleries, or hanging a coil on a rafter.
It also serves as a building block: the Span Loop begins as a Bellringer's Knot and adds a tuck — and it's that tuck, not this base form, that carries the security there.
Other Names
Category
Type
Variations |
Notable Features
- Fast both ways: it ties in seconds and spills with one light pull on the free end.
- No rope end needed: it forms mid-line, and it never jams, because the bight is nipped rather than wedged.
How to Tie the Bellringer Knot Step by Step

Tying this knot is so easy it can be done in just a few seconds. But as with any other knot, it's going to require a lot of practice. So, grab your rope and follow along
Step 1:
Take your rope and feed it through an anchor point, such as a backpack handle. With your right hand, take your standing end and perform an overhand turn to form a loop. To perform an overhand turn, simply imagine that you're turning the car's ignition to the ON position.

Step 2:
With your left hand, take the free end and pinch a bight in that rope until it forms a U-shaped fold.


Step 3:
Push that U-shaped fold through the loop of the rope up to three inches across

Step 4:
With your left hand, hold on to the two lines of the rope. Use your right hand to pull the standing end to tighten the knot and form a bellringer

Tying a bellringer knot requires a lot of practice. Tighten it slowly and evenly to prevent the knot from collapsing and unraveling. With smooth pressure, the knot will bight down on itself and hold the tension. When you release that tension, the line will come completely free.
Pro Tip: keep the half hitch snug and right up against the standing part. Paul Hasluck's 1907 handbook Knotting and Splicing Ropes and Cordage gives that as the one rule for this knot — if you can see daylight between the hitch and the standing part, set it again.
What Kind of Rope Works Best with the Bellringer Knot?
Tying this knot is so easy it can be done in just a few seconds. But as with any other knot, it's going to require a lot of practice. So, grab your rope and follow along
You can pretty much use a thin or thick rope to tie a bellringer, but it does work better with some types of ropes than others.

Thin and supple ropes like nylon paracords don't really work as well. But it is possible if you have enough patience and practice.

Using Kevlar or Dyneema ropes to tie a bellringer? You're going to find them a little more challenging because they're more slippery than other types of ropes.

Your best bet is larger diameter cordage because it's stiffer and provides a little more friction. It's also important to never use this on a person or anything valuable because this knot is not to be trusted.
Similar Knots
Sheepshank Knot vs. Bellringer's Knot
Clifford Ashley put it plainly in The Ashley Book of Knots: this is the first half of the ordinary sheepshank. The full sheepshank knot traps the shortened section between two hitches instead of one.
- Advantage: holds a shortened section under tension between two anchored ends.
- Disadvantage: needs both ends loaded, and gives up the one-tug release.
Safety Remote Release Hitch (Bell Ringer's Knot) vs. Bellringer's Knot
The Safety Remote Release Hitch is the same knot with a second half hitch added — Ashley's own note that long, heavy rope sometimes wants two.
- Advantage: shrugs off bumps, wind and brief slack moments.
- Disadvantage: a little slower to tie and to release.
Kamikaze Knot vs. Bellringer's Knot
The Kamikaze Knot is a deliberately broken sheepshank built to shake loose and give most of the rope back.
- Advantage: purpose-built for shake-loose retrieval.
- Disadvantage: you sacrifice rope, and it belongs to genuine emergencies only.
Downsides
It holds only while the standing part stays under tension — the design, not a flaw.
- Slack undoes it: lose tension for a moment and the knot is gone.
- A snag mid-lower is a dropped load: if what you're lowering hangs up and takes the tension off, the knot can release early.
- Set once: the shortening is fixed when you form the bight; changing it means retying.
- The loop is not a load point: the hanging bight is a parking space, nothing more.
History of the Bellringer's Knot
Ashley traces the Bell Ringer's Knot to a dictionary of 1815, calls it "probably a knot of considerable antiquity," and gives it one purpose: keeping a long rope off the belfry deck when the bell isn't in use. Hasluck's 1907 handbook figures the same knot in the same church-tower setting. It isn't the knot bell-ringers use today, though: the Central Council of Church Bell Ringers' own Belfry Upkeep guidance on ropes now describes shortening a long bell rope with a temporary figure-eight that gets removed after use. The name outlived the job in the trade that named it.
FAQ
What is the Bellringer's Knot used for?
Parking slack in a hanging rope and getting it all back with one tug — bell ropes, rope ends in a loft, or lowering a pack off a ledge before you climb down.
Is the Bellringer's Knot secure?
Only while the standing part is under tension. Lose that tension, or bump the free end, and it releases completely.
Is the Bellringer's Knot the same as a half sheepshank?
Yes — half sheepshank is the structural name for it: one bight and one half hitch, where a full sheepshank uses two of each.
Important Notes on Safety
Never tie the Bellringer's Knot onto a person or onto anything you can't afford to lose. One pull on the tail, or one second without tension, releases the whole knot — and wind, a snag or a curious hand all count as a pull.
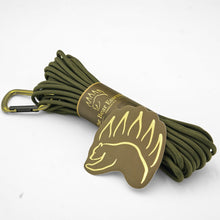
Want to practice tying the bellringer? Check out the Bear Essentials Knot Tying Kit, complete with a pocket guide and two practice ropes. Explore more knot tying guides.


