Knowing how to safely construct a Bushcraft ladder is a valuable skill, especially for tasks like harvesting chaga mushrooms. These prized mushrooms, known for their high antioxidant content, often grow out of reach on Birch trees. With the ability to fashion a ladder, you can access these treasures while camping, adding a rewarding activity to your outdoor adventures.


Step-by-Step Guide on How to Tie a Clove Hitch:

Gathering Materials
To begin, scout for sturdy fallen trees suitable for ladder beams. You'll also need strong cordage, preferably about double the length of your ladder poles. Paracord is a popular choice for its strength and versatility, making it an excellent option for this task.

Step 1:
Find some down trees that are solid and sturdy.

Step 2:
Start by taking the exact halfway point of your cordage, fold an overhand loop followed by another of the exact same loop.
Constructing the Bushcraft Ladder
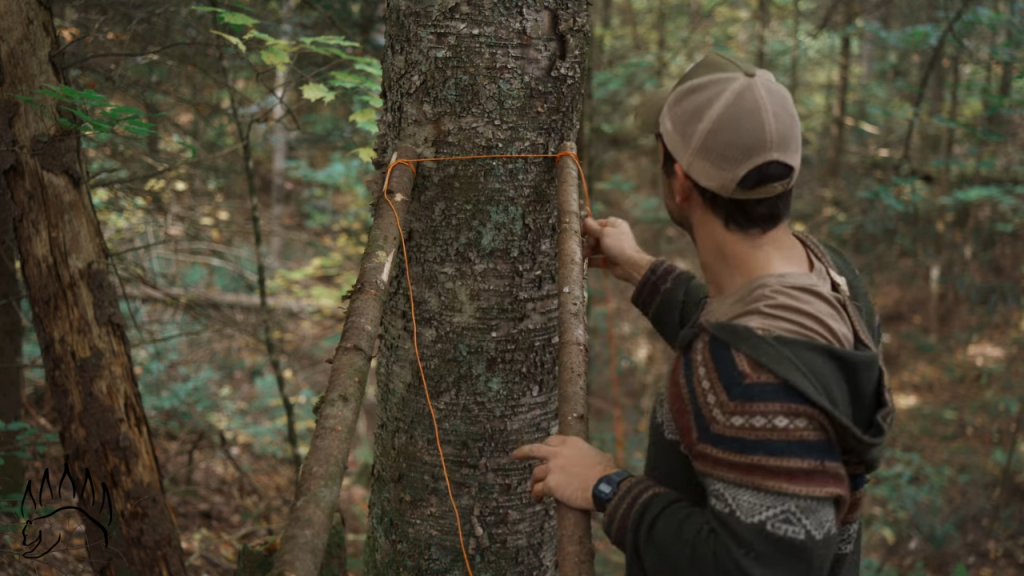
Start by tying clove hitches at the tops of both poles using the midpoint of your cordage. Then, create support rungs using half hitch knots spaced evenly down the length of the poles. Repeat this process on both sides, ensuring symmetry and stability.

Step 3:
Taking the exact halfway point of your cordage, fold an overhand loop followed by another of the exact same loop. Put the second loop behind the first and put it over the ladder pull.
Step 4:
Leave you with two clove hitches binding the tops of both poles together.

Step 5:
Wrap around the pole and thread it through that loop there this is called a half hitch.

Step 6:
Putting the half hitches at the exact same distance.

Step 7:
Once we get to the bottom it's time to lock it all in place. Just tie a clove hitch at the bottom to make it a little bit more secure.
Securing the Ladder
To secure the ladder at the bottom, opt for a constrictor knot for added grip, especially if using slippery rope. This knot tightens securely and is ideal for ensuring the ladder stays firmly in place during use.

Step 8:
After securing each ladder beam it's now ready to use. Start by lifting those poles up on the tree.

Step 9:
The Wider apart the beams of the ladder are at the top the more it'll snug against the trunk of that tree making it a little bit more secure.
Adding Rungs and Harvesting Chaga
Insert solid, non-rotting rungs into the ladder, starting from the bottom and working your way up. Climbing the ladder tightens the cordage, ensuring stability. Once the ladder is set, you can climb safely to harvest chaga, ensuring sustainable harvesting practices by leaving the bulk of the mushroom intact.

Step 10:
Now, it's time to put the rungs of the ladder in one by one again and these should be cut by solid, not rotting pieces that can support your weight.

Step 11:
Take a bit of the chaga leaving the bulk of it is how you sustainably harvest this stuff.
Crafting a Bushcraft ladder opens up opportunities for accessing out-of-reach treasures like chaga mushrooms while camping. With the right materials and knot-tying skills, you can construct a sturdy and reliable ladder for various outdoor tasks, enhancing your wilderness experience. If you commonly forget the knots in the field, I've made this pocket-sized reference guide with 10 of my favorite knots along with where to tie each one at your campsite.
Access knot-tying tutorials. Each card has a QR code that links to all The Bear Essentials Knot Tying tutorials on YouTube if you ever need to see them on the fly. Order yours today!